Ears (Make 2)
- Row 1: Ch 2, 6 sc in the 2nd ch from the hook [6].
- Row 2: inc x 6 [12].
- Row 3: 2 sc, inc, 5 sc, inc, 3 sc [14].
- Row 4: 2 sc, inc, 6 sc, inc, 4 sc [16].
- Row 5: 2 sc, inc, 7 sc, inc, 5 sc [18].
- Row 6: 18 sc (no changes).
- Leave a long yarn tail for attaching ears to the head.
Body
- Row 1: Ch 8, sc in the 2nd ch from the hook, 6 sc, 3 sc in the last ch. Turn the work. Sc in the next 6 sts, 2 sc in the last st [18].
- Row 2: 6 sc, 3 inc, 6 sc, 2 inc [24].
- Row 3: 7 sc, inc, 1 sc, inc, 1 sc, inc, 7 sc, inc, 1 sc, inc, 1 sc, inc [30].
- Row 4: 8 sc, inc, 2 sc, inc, 2 sc, inc, 8 sc, inc, 2 sc, inc, 2 sc, inc [36].
5-9. Rows 5-9: 36 sc (5 rows). - Row 10: 4 sc, dec x 6 [30].
- Row 11: 30 sc (no changes).
- Row 12: 3 sc, dec x 6 [24].
- Row 13: 24 sc (no changes).
- Stuff the body with filling.
- Leave a long yarn tail for attaching the head.
Lower Legs (Make 2)
- Row 1: Ch 3, sc in the 2nd ch from the hook, 1 sc, 3 sc in the last ch. Turn the work. 1 sc, 2 sc in the last st [8].
- Row 2: inc, 1 sc, 3 inc, 1 sc, 2 inc [14].
- Row 3: inc, 3 sc, inc, 1 sc, 2 inc, 3 sc, 2 inc, 1 sc [20].
4-5. Rows 4-5: 20 sc (2 rows). - Row 6: 3 sc, dec, 2 sc, dec, 2 sc, dec, 7 sc [17].
6-7. Rows 7-8: 17 sc (2 rows).
- Stuff the legs with filling.
- Leave a long yarn tail for attaching the legs to the body.
Upper Legs (Make 2)
- Row 1: Ch 4, sc in the 2nd ch from the hook, 2 sc, 3 sc in the last ch. Turn the work. 2 sc, 2 sc in the last st [10].
- Row 2: inc, 2 sc, 3 inc, 2 sc, 2 inc [16].
3-4. Rows 3-4: 16 sc (2 rows). - Row 5: dec, 2 sc x 4 [12].
5-10. Rows 6-10: 12 sc (5 rows). - Row 11: dec x 6 [6].
- Stuff the legs with filling.
- Leave a long yarn tail for attaching the legs to the body.
Tail
- Row 1: Ch 2, 6 sc in the 2nd ch from the hook [6].
- Row 2: 1 sc, inc x 3 [9].
3-4. Rows 3-4: 9 sc (2 rows). - Rows 5-6: 2 sc, 1 hdc, 3 dc, 1 hdc, 2 sc [9].
5-8. Rows 7-8: 9 sc (2 rows).
- Leave a long yarn tail for attaching the tail to the body.
Black Spot on the Head
- Row 1: Ch 2, 6 sc in the 2nd ch from the hook [6].
- Row 2: inc x 6 [12].
- Row 3: 1 sc, inc x 6 [18].
- Row 4: 2 sc, inc x 6 [24].
- Row 5: 3 sc, inc x 6 [30].
- Leave a long yarn tail for attaching to the head.
Black Spot on the Back
- Row 1: Ch 2, 6 sc in the 2nd ch from the hook [6].
- Row 2: inc x 6 [12].
- Leave a long yarn tail for attaching to the back.
Two Front Paw Spots
- Row 1: Ch 2, 3 sc in the 2nd ch from the hook [3]. Turn the work.
- Row 2: inc x 3 [6]. Turn the work.
- Row 3: 1 sc, inc x 3 [9].
- Leave a long yarn tail for attaching to the front paws.
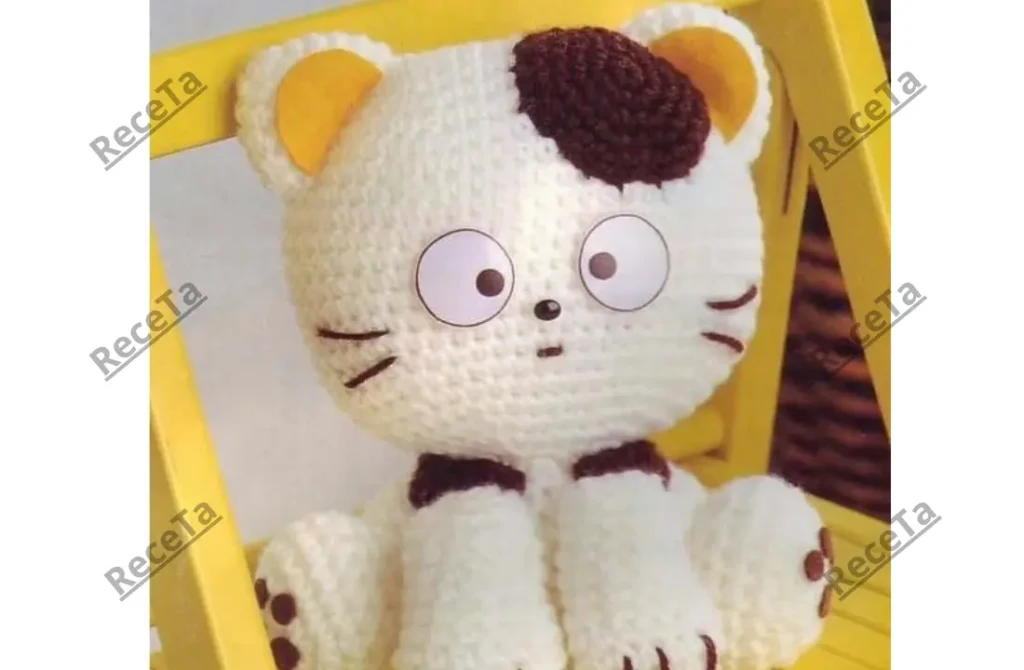
Assembly
- Attach the head to the body.
- Sew on the ears, paws, and tail.
- Use black yarn to add the spots on the head, back, and paws.
- Embroider the nose and mouth.
- Position the toy’s eyes carefully, ensuring they are spaced well apart.
Your Cute Crochet Kitten is Ready!
This crochet kitten, in the adorable Japanese anime style, is ready to be loved and hugged! Its charming features make it a perfect addition to any collection or a sweet handmade gift for loved ones.
Enjoy crocheting your kitten and bring this cute character to life!
This post is formatted and structured for easy copy-pasting into a WordPress blog. Let me know if you need any modifications or additional details!